Showing posts with label recipe. Show all posts

Tuesday, July 26, 2016

the heart of the home...

Would you like to take a step inside my sister's kitchen & look around?
 
 
You'll love it here, it's one of the coziest places I know.
I love to sit and chat over a cup of tea or coffee by the big picture window that looks over her patio where the kids are playing, and her flower garden where bees are buzzing & butterflies are fluttering.
 
When a kitchen sink is as gorgeous as this it makes washing dishes a joy!
 {And how perfectly does this vintage tablecloth that's doing duty as a skirt apron match the cabinet?! I just can't get over it.}
 
 
 Some of those flowers usually find their way indoors, bringing their freshness & sunshine with them.
 
 
 Kitschy kitchen goodness is in every nook and cranny.


Of my three sisters, Beth & I probably have the most similar decorating style.
We both love anything cheerful, farmy, kitschy, & vintage.
Which can make garage sale-ing together a little tense.
Just kidding. We share pretty well. ^_^
 
 
In Beth's country kitchen there's always sure to be some fresh veggies about the place this time of year.
That's bound to be when your husband is a landscaper & expert gardener with about 4 or 5 vegetable patches.
{I've lost count how many actually...there seem to be more every year!}
 
 
Even her ceiling fan is cute for cryin' out loud!
We affectionately call it a fandelier.

 
I helped her paint her cabinets this beautiful shade of Annie Sloan chalk paint, Henrietta, a couple years back. The insides are painted with Antoinette & have Hello Kitty liner on the shelves. I neglected to take a piccy of that, but I'm sure you can picture it.
There's nothing like climbing around on the counter tops with the Beatles playing in the background whilst sipping endless cuppas with your sister.


 Speaking of cuppas...
here is the all important coffee counter.
*angelic choir music plays*
{I'm irritated with myself for accidentally cutting off the head of the cute crocheted chick-i-poo on top of her lil Keurig. Bah. Didn't realize I'd done it till I got these piccies on the 'puter. You can see it un-decapitated in the previous photo though!}

 
{A refrigerator isn't complete without some artwork!}
Even the fridge got a makeover!
She glued a pretty wood decal thingy on & then painted over it.
That chalk paint really does stick to anything.
I gave her this old metal garbage can & gave it a coat of Antoinette.
{Oscar the Grouch simply couldn't make his mortgage payments anymore & had to move to a smaller can. ^_~ You know, the economy & stuff.}
 
 
Everywhere you look there's something cute to make you smile...
this corner cabinet which belonged to our great grandma is a home to all sorts of cute tchotchkes...
vintage hanky bunting adorns the window...
and some adorable vintage wicker umbrellas hang jauntily from a hook.

 
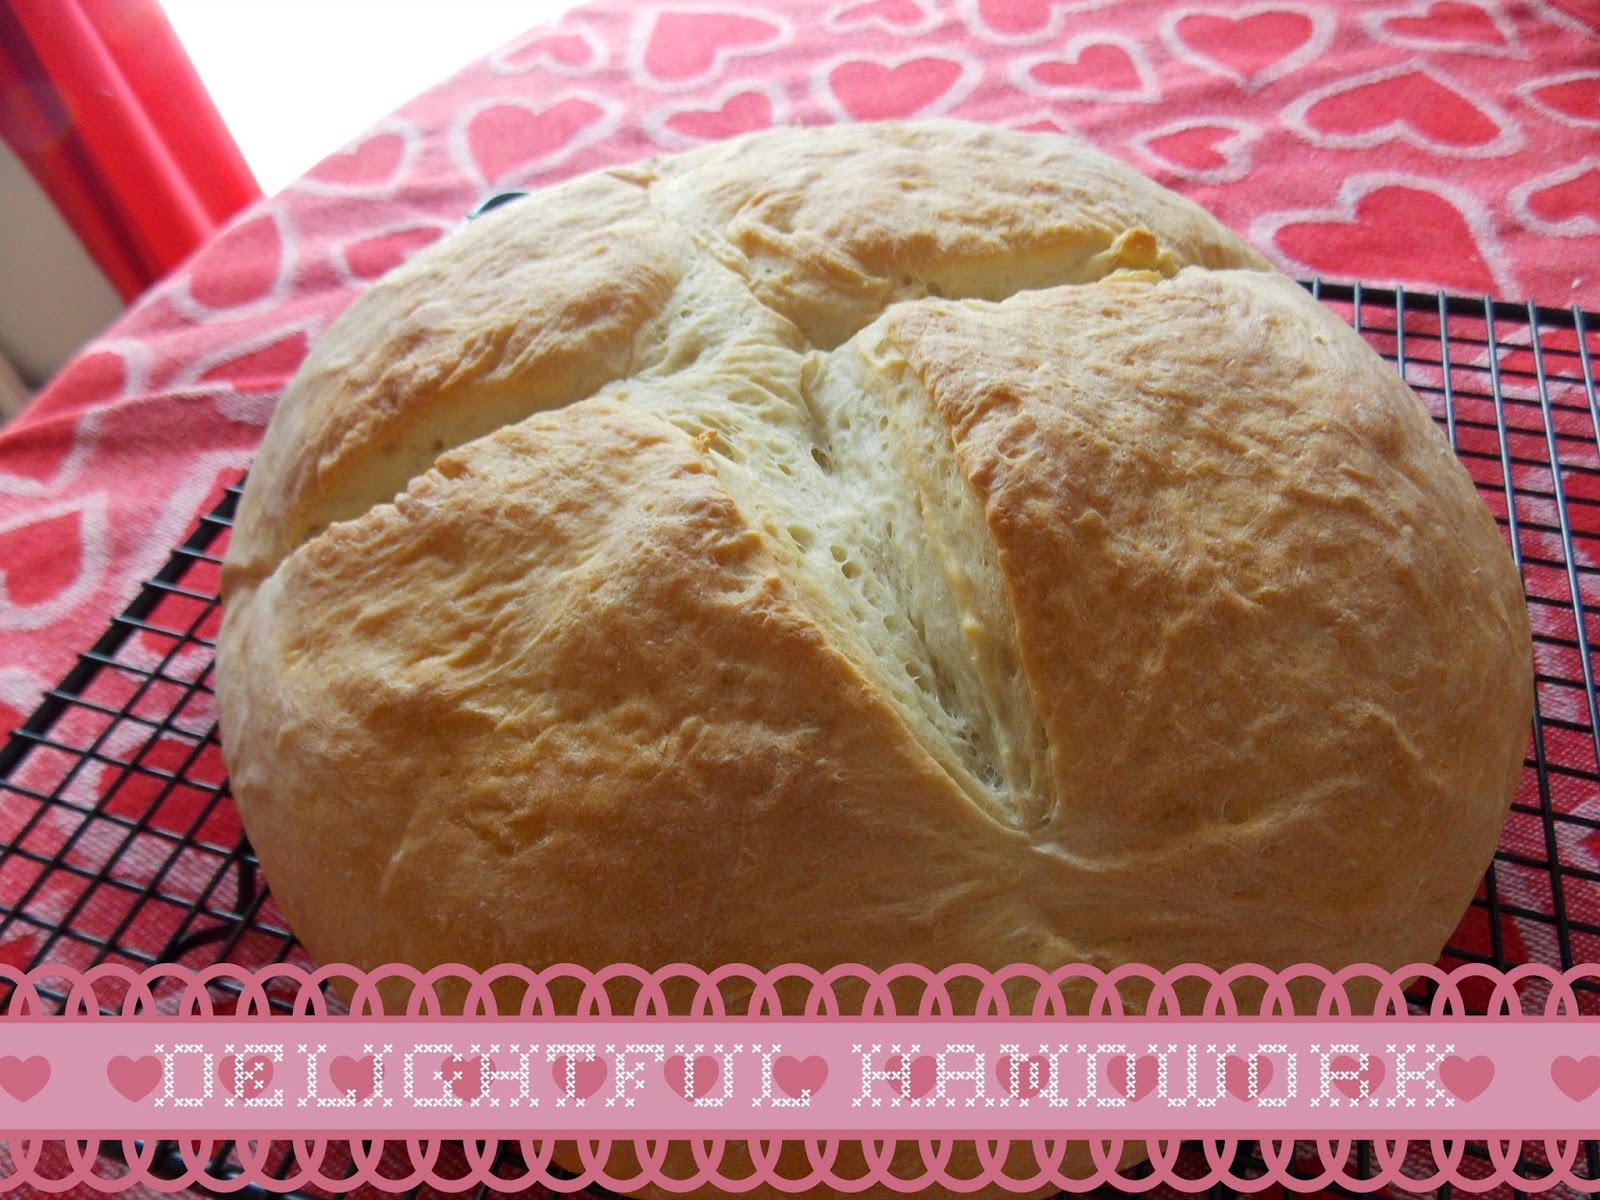
Possibly one of my favorite things about Beth's kitchen is that she always has something yummy baked. {And she's always willing to cut you a slice} It was yummy zucchini bread this time with zukes from {one of} their garden{s}.  ;)

If you're interested in the recipe she said she uses Better Homes & Gardens' Recipe, but without the nuts cuz eww. ;P

I hope you've enjoyed your visit to Bethie's kitchen!

Much love,
Miss Michelle ^_^
{Photos by yours truly}

Tuesday, July 5, 2016

30 baby pies for the 4th of july...

I hope you all had a lovely Independence Day!
 I sure did.
The day was spent in my favorite way - with family & friends.
I found some adorable mini pie tins at Dollar General (of all places!) a couple months back & I just knew what I would be making for our celebration.
 
In the Summer we try to use the oven as little as possible to keep the house as cool as possible.
So, I decided cold pies were in order & graham cracker crust since they don't require such a hot oven as regular pie crust. Although we just recently bought a nice toaster oven that could actually accommodate 2 regular sized pies or 12 mini pies. So, I could have actually made baked pies, but I already had my heart set on cream pies.
I thought I'd cheat & use boxed pudding mixes & canned filling too just to make things easy.
But then we got this beautiful box of juicy Georgia peaches.
Strawberries are my all-time favorite fruit, but peaches run a close second.
I couldn't do it.
I couldn't cheat.
I had to use these fresh beauties.
I know, I'm a weirdo. ;)
And then I remembered how wonderful homemade pudding is too.
 Plus we recently had a break in the hot weather & had a few days of gorgeous Fall-like weather.
So, that clinched the deal.
 
~*~
There's nothing easier than a graham cracker crust!
 I made a few gluten free ones as well for my sister Beth.
 
 I used a cream cheese mixture under the fresh peaches.
It was pretty good, but if I were to do it again I would use homemade vanilla pudding instead.
Mmm...there's nothing quite like a fresh peach glacé pie
I did make coconut cream & banana cream using the vanilla pudding.

Abbey is always my little helper. ^_^
She put the little flags on.
I finally found a use for this cute scrapbook paper a friend gave me a couple years ago.

 
About halfway through the baby pie assembling I thought
"Wait just a cotton pickin' minute, how am I gonna fit all of these in our fridge?!"
You should've seen the rigged up system of egg cups & spools of thread I concocted to stack the trays.
 

How cute is this widdle pie?

{Shenanigans}

My sister Beth has the cutest décor, doesn't she?
Her whole kitchen is just thing cutest thing.
I've said it before but it seriously deserves its own post at some point.

  Gluten free for Beth ^_^
 

My favorite part of the day, though, was spending time with my lil poopsies.
{See them playing on the swing set out the window? That's where we spent the better part of the day.}

Annelise


Twas a grand ol' celebration.
 
Here are the recipes if y'all are interested.
 
Graham Cracker Crust:
1/3 c. butter
1/4 c. sugar
1 1/4 c. finely crushed graham cracker crumbs
 
Melt butter; stir in sugar. Add crushed crackers; toss to mix well.
Spread evenly onto bottom & sides pie plate.
I used a small measuring cup to press them.
Bake in a 375* oven for 4-5 minutes or until edge is lightly browned. Cool on a wire rack.
Makes 1 9-inch pie crust or 8 mini pie crusts.
 
Peach Glacé Pie:
6 c. sliced, peeled peaches
2/3 c. water
2/3 c. sugar
2 T. cornstarch
 
In a medium bowl mash 1 c. of the peaches well with a potato masher. Add water & set aside.
In a medium heavy bottomed saucepan combine sugar & cornstarch; stir in blended peach mixture. Cook and stir over medium heat until mixture is thickened and bubbly. Cook and stir 2 minutes more. Cool for 10 minutes without stirring.
 
For a whole pie:
Spread 1/4 c. of the glaze over bottom & sides of a baked shell.
Arrange half of the fruit in crust.
Carefully spoon half of the remaining glaze over fruit.
Repeat the last two steps being sure that glaze completely covers all of the fruit.
Chill 1 to 2 hours.
 
For minis:
Arrange 1/3 to 1/2 c. of peaches in each tins, depending on whether you're making peaches & cream pies or plain peach.
Top with a large spoonful of glaze, dividing evenly.
Chill 1 to 2 hours.
 
Top with whipped cream.
Yum!
 
Vanilla Cream Pie:
4 egg yolks
3/4 c. sugar
1/4 c. cornstarch
2 1/2 c. whole milk
(or half & half if you're awesome)
1 T. butter
1 1/2 t. vanilla
 
In a medium heavy bottomed saucepan combine sugar and cornstarch.
Gradually stir in milk {or 1/2 &1/2 ^_~}.
Cook and stir over medium-high heat until thickened & bubbly; reduce heat.
Cook & stir for 2 minutes more.
Remove from heat.
Slightly beat egg yolks with a fork.
Gradually stir 1 c. of the hot filling into yolks.
Add yolk mixture to filling in the pan.
Bring to a gentle boil; reduce heat.
Cook and stir for 2 minutes more.
Remove from heat,
Stir in butter and vanilla.
 
For Coconut Cream Pie:
Stir in 1 c. flaked coconut.
Garnish with whipped cream & toasted coconut.
 
For Banana Cream Pie:
Arrange sliced bananas on the bottom of baked pie crust.
Top with pudding.
 
Top with whipped cream.
{Of course}
 
If you accidently eat all of the pudding on its own before it makes it into a pie:
I won't judge.
It's delish.
;P
 
Much Love,
Miss Michelle ^_^
{All photos taken by me apart from the ones I'm in. Those are by my sisters Beth & Kelsey.}


Sunday, January 4, 2015

snow day...

We finally got some of the white stuff!


I live atop a steep hill
so
when it snows...
I get a snow day!
Oh snow, you still make my heart happy.
This morning when I pulled back my curtain I made a little gasp.
Snow!

 
All the Christmas paraphernalia was carefully & snuggly tucked away the past couple days.
Do you ever feel like you can breathe again after you take down your Christmas décor?
(After the dust has settled, of course. ^_~)
Don't get me wrong.
I love Christmas.
It is my very favorite time of the year.
I thoroughly enjoy hauling out the bulbs & baubles each year.
And yet there is something so refreshing...calming...
about tucking it all safely away for another 11 months or so.
 
***
 
We had to miss Church this morning -
the only downside of this lovely snow day.
We all loaded up in the car & headed down our driveway.
When we reached the end we took one look at the road down the hill...
then turned around.
 
***
 
So...
I decided to make a nice lunch with whatever I could find in the freezer.
I came across a couple beef soup bones.
Perfect!
I'll make some soup.
Dad suggested some lentils we had languishing in the pantry.
Again, perfect!
It turned out rather well (though I say it myself!)
I have some little pots of herbs on the windowsill that I bought to die a slow & painful death here.
They're tough little things & have made it this long alive.
So, I used some lovely fresh rosemary in the soup as well.
(If anyone is interested I can give you my full recipe. Just ask!)
And what is hot soup without fresh bread, I ask you?
I didn't have enough time to make my usual bread recipe
so I searched Pinterest for a quicker yeast bread.
I hit Pinterest gold!
 
 
The recipe made two of these lovely loaves in about an hour!
And let me tell you - it. was. good.
You can find that recipe here: Simple One Hour Bread.
 
***
And,
what else does one do on a snow day but take pictures of one's new decorating sans Christmas stuff?
I gave my new record player a place of honor on my bookshelf.


I bought all of She & Him's albums on vinyl with Christmas moo-lah.
I put Volume 3 on display because I love the colors.
I had plenty of pastel colored whosits & whatsits to make a little vignette.

 
 Note the adorable Beatrix Potter fabric a friend of mine gave me for Christmas!
(Thanks Gussi!)
The cute little mushrooms were a birthday gift from sister Beth
& the restaurantware tea cup an Etc. Shop find.
(50 cents - WHAT?!?)
 
 
Well there's not much to do now but sit with a cuppa, have a piece of shortbread (or two),
and browse my new favorite seed catalog.
Can you tell I had a *little* bit too much fun editing these pics on Picmonkey?
Have a lovely day!


Wednesday, November 26, 2014

Me Oh My Cherry Pie!

Without the red dye!


Ok, I'm done rhyming now. ;)


First things first you'll need some crust.
I make my Grandma Linda's Lard Pie Crust.
You can find the recipe on my old blog, birds of the air, here.
You'll need a couple lovely egg yolks such as these laid by my own dear Jemima Puddle Duck.


Now for the filling!
You need 3 cans of tart cherries in water.
I normally have to buy Oregon brand cherries,
but thankfully my beloved Aldi was offering their own canned cherries recently.
(For about 1/2 the price! Score!)
You'll drain the cherry "juice" into a pyrex measuring cup & use 1/2 of it in the filling.
 
 
Here are what the cherries look like before you cook them.
Rather pale, but never fear they'll turn a lovely ruby red before we're through!
 
 
After a few minutes of simmering they are beautiful!
 
Here is the recipe:
3 cans red tart cherries in water
4T cornstarch
1 1/4c sugar
1/8t salt
2 pie crusts
 
In a heavy bottomed saucepan combine cherries with 1 1/2 cans worth of their "juice", cornstarch, sugar, & salt. Bring to a simmer and cook over med-low heat for about 10 minutes, stirring regularly. Set aside to cool. Preheat oven to 425*F. Roll out crusts. Line pie plate with one. Pour in the filling. Make a lattice top. Brush with egg white. Bake on a foil lined baking sheet for 20 minutes. Lower temperature to 375*F, cover crust with a foil shield & bake for 30-40 minutes more. Let cool about 3 hours to allow pie to set properly.
(I found this great recipe via Pinterest.  Here is the original recipe source.)
I've always had trouble with cherry pies not setting up properly & not having that beautiful red without red dye #40. This recipe solved both problems. Yay!
 
 
All ready for tomorrow!
Have a wonderful Thanksgiving!!
^_^

Thursday, June 12, 2014

in the good ol' summertime...

Ready to hunt down some good deals at a local flea market with my little sister. ;)
For some strange reason,
 I'm actually looking forward to summer this year.
I can't even tell you why...
I just am!
In the photo above I'm wearing my new summery seersucker dress that I made.
I'll be wearing mostly dresses this summer. 
I've just found them very comfortable as of late.
I even made a cotton slip for underneath.
Nylon slips are like some kind of torture to me once it's above 75*! :D
At that flea market I scored a few vintage dresses & some fabric!
Hopefully they will be featured in a future post.
One of the dresses, a farm-tastic brown checkered shirt-dress, fits like it was made just for me!


 On Memorial Day I made fried chicken (for the 1st time!) for my family.
Unfortunately I didn't get any photos of that,
but I did get a few pics of the strawberry pie I made.
Nothing says "summertime" like fresh strawberry pie!
I used Mary Jane's Farm's Butter Cookie Pie Crust recipe.
It is very good! I usually make my lard pie crust, but with strawberry pie I really like a butter crust.

 Don't for get to save the hulls for the chick-ie-poos!
 I added fresh blueberries to one of them just 'cuz I had them.
What is a slice of strawberry pie without a scoop (or two) of homemade vanilla ice cream?

Here's the recipe:
Sky High Strawberry Pie

2 lbs fresh strawberries
1 1/2 c. sugar
6 T. cornstarch
2/3 c. water
1 - 9 inch baked pie shell

Hull & quarter strawberries into a large bowl. (Save the scraps for the chickens!)
In a medium saucepan, combine sugar & cornstarch.
Add 3 cups of strawberries and mash well with a potato masher.
Add water. Bring to a boil over medium heat, stirring constantly. Cook & stir for 2 minutes.
Remove from heat. Let cool slightly. Add to remaining strawberries in the large bowl.
(You can remove a cup or so of the strawberries to make a pretty design on the top of the pie if you wish. I didn't do this 'cuz you can't tell what the pie looks like if you put enough ice cream or whipped cream on top!) ;P
Chill for about 20-30 minutes.
Pile into baked shell.
Chill for 2 or 3 hours.
Serve with ice cream or whipped cream.
Yum!
^_^
Enjoy!

Friday, April 11, 2014

delicate lemon squares...

Much like Beth on Little Women whenever I can't think of what to say...
I write a recipe. :)
 
This recipe is a favorite in our family.
It is a lesson in Always-Give-Recipes-To-Others-in Case-You-Lose-the-Original.
Mema, the original finder of this recipe, had made a copy for my sister Beth a few years back.
She's recently misplaced it so I was quite thankful that it wasn't lost forever.
(I tried others, but the crust wasn't as tender as this one.)
 
 
Delicate Lemon Squares
 
1 cup flour
1/4 cup powdered sugar
1/2 cup butter
 
***
2 eggs
3/4 cup sugar
3 T. fresh lemon juice + the zest
2 T. flour
1/2 t. baking powder
powdered sugar for dusting
 
Stir together 1 c. flour & 1/4 c. powdered sugar;
cut in butter 'til mixture clings together.
Press into an un-greased 8x8x2" baking pan.
Bake at 350 for 10-12 minutes.
 
In mixing bowl beat eggs;
add granulated sugar, lemon juice, & zest.
Beat 'til slightly thick & smooth, 8 to 10 minutes.
Stir together 2T. flour & baking powder;
add to egg mixture.
Blend just 'til all is moistened.
Pour over baked layer.
Bake at 350 for 20-25 minutes.
Dust with powdered sugar.
Cool; cut into 1" squares.
 
Yum! ^_^
                         
 
They don't sit around for too long!
 
Enjoy!
Michelle ^_^

Monday, December 23, 2013

very soon it will be Christmas day!

Remember:
"And the Word became flesh, and dwelt amoung us, and we beheld His glory, glory as of the only begotten from the Father, full of grace and truth." John 1:14

***

These are one of my favorite cookies!
I got the recipe from my Mema (Dad's mom).
I'm never quite sure what to call them...
I've heard them call Mexican Wedding Cookies, Italian Wedding Cookies, or Snowballs.
Anyroad, they're delish!
Now you may have had these before, but if your recipe doesn't read as follows it ain't the same thing!
Here is the recipe:
1c. flour
1/2c. powdered sugar
1/2c. corn starch*
3/4c. butter, softened
1/2c. nuts, finely chopped, optional
Sift dry ingredients together in a medium bowl. Set aside.
In a large bowl cream butter then slowly mix in dry ingredients & nuts if desired.
Roll teaspoonsful into balls at place on parchment lined baking sheets.
Bake at 300*F for 20-25 minutes. Cool on a wire rack & dust generously with powdered sugar.
Yum!
It's the CORN STARCH that makes the difference. Trust me they - melt in your mouth!


Here is my dress!
Sorry for the poor quality of the pictues, I took them with my phone.
I wore it yesterday to church. Hopefully someone can snap a pic of me in it tomorrow. 


I am pretty pleased
with it! I wear it with a
red plaid belt & black heels. Oh, also in the back opening I sewed in some black lace. :)

Also,I'm officially DONE with all my Christmas gifts! Woo-hoo!


Have a very HAPPY CHRISTMAS!!!!